This tutorial will teach you to install Lightroom Mobile presets into the free app. You will also be able to save them as presets and apply them with one click.
There are a few ways to import and sync your new presets into the Lightroom Mobile app if you already have a subscription for the desktop version of Lightroom. If you don't have it and you want it, click here to subscribe to Lightroom Desktop. Pick the Photography plan, which costs around $10 a month and includes Lightroom and Photoshop.
But what if you just purchased a few mobile presets and want to use them on the free app only without having to pay for the scary Desktop version? This will walk you through it step by step. I will also show you how to save them as your own Presets in folders so can return to them every time you go to edit a photo.
If you haven’t yet, check out my custom Desktop and Mobile presets here.
Step 2: Transfer the DNG files to your phone
The easiest way to do this is by using Dropbox but you can use any other file transferring method as well. If you don’t have Dropbox yet, sign up here – it’s free! To use Dropbox, simply drag your DNG files into your Dropbox folder and wait for the files to sync.
Another way for apple users is simple using Airdrop.
Step 1: Download Lightroom CC
Open your A

Step 2: Create an Account
Set up to create an Adobe Account. It's super fast and 100% free!
Step 3: Download the Presets
After purchase, you will receive an email with a download link for your preset. Most mobile presets you purchase (including mine) will come as DNG files that you can download directly to your phone. If that’s the case you won’t need a computer at all.
Some files come compressed into a ZIP file. Most mobile can't open ZIP files. If this happens, you will need to download the file to your computer first. If you don’t have a computer (who even are you?!), contact the person you are purchasing the presets for and ask that they provide you with unzipped DNG files.
Once you’ve downloaded the ZIP file, double-click to unzip it. That should create a folder of the same name with the DNG image files inside. Each DNG file is a preset that you now need to move to your phone and import into Lightroom.

Step 4: Import the preset files into the Lightroom app
At this
Open the Lightroom app and create a new album. In this
Step 4: Create and save your Presets
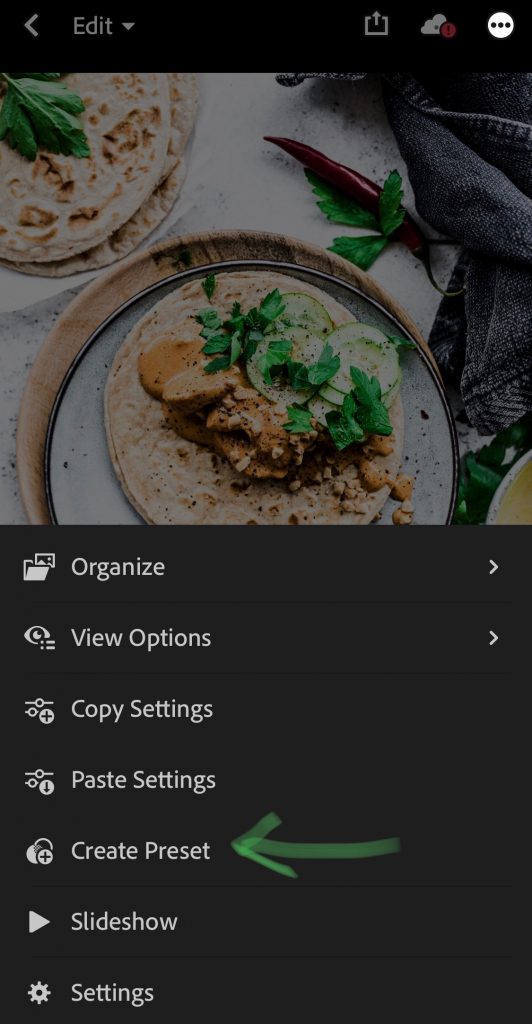
Go into the album containing your newly imported DNG files. Open the first file, tap on the 3 dots icon at the top right of the screen and then tap on Create Preset. Go into your new album and tap on any of the preset pictures to open it. Tap on the three dots in the upper right corner and then tap 'Create Preset'
I personally check all boxes except for Tools, Optics and Geometry. That’s because those parameters vary from picture to picture.

When you’re done with the settings save your preset by tapping on the checkmark icon at the top right corner.
Repeat this step for each DNG file as you will need to save each preset separately.
Step 5: Editing with your Lightroom Mobile presets
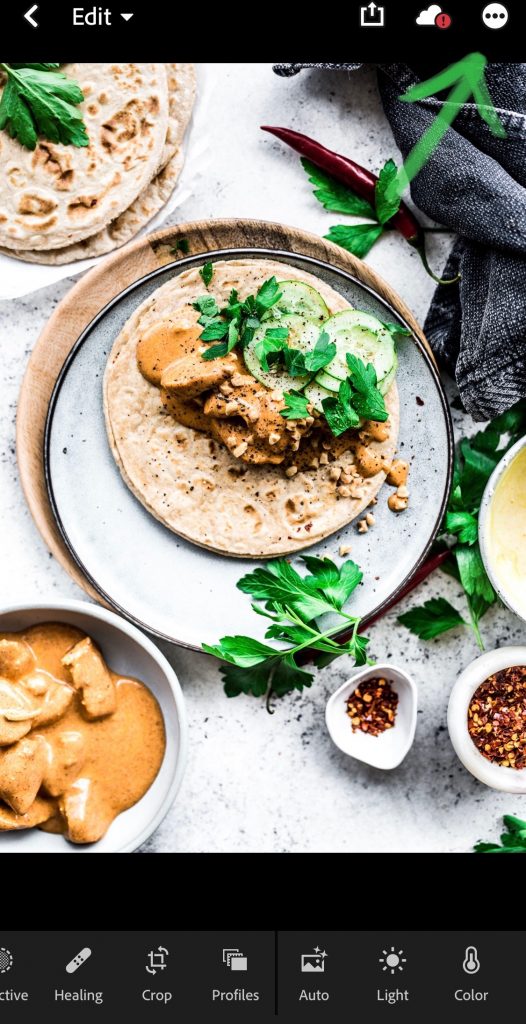
To use your new presets just go back into your library and open a photo you want to edit.
Find the Presets icon in the menu at the bottom of the screen and tap on it. Make sure the Preset Group that’s selected is the one where you saved your new presets. If you saved them in the User Presets group, select that.
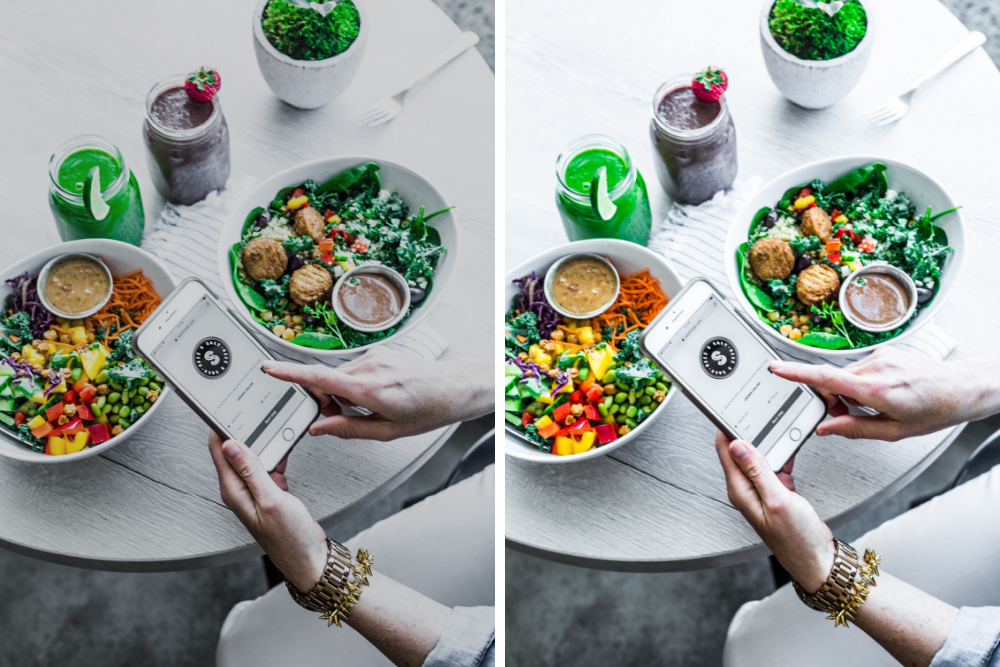
Now you can edit the photo by tapping on a preset from the list and then tapping on the checkmark. You can still continue to edit the photo and make adjustments if you
DONE!!! How cool is that?
once your preset is applied you can save your photo to your camera roll or send it straight into Instagram!
This is an informative post. Got a lot of info and details from here. Thank you for sharing this and looking forward to reading more of your post.
Exercise to gain weight
Thank you very much for this awesome post.
I couldn’t make my food prep look this good – with or without filters – in a month of Sundays 🙂
haha! I’m sure you could Adam 🙂 Lots of practice!